Patch cords are the links that keep the electrons in your studio flowing. The conversation today will be centered on some patch cord technicals and what your priority should be when you buying new patch cords.

On Electrons
At a very basic level, the most basic level, electrons have to knock into each other continuously through the stranded wire or solid conductors (including the screws, solder points and wire in the circuit) in order to transfer electrical power through the wire. As long as there is a good electrical connection through the wire, resistance is low, the power can flow and you’ll get audio. No special colors or shielding necessary. (Good quality drain wires and adequate shielding will always improve the quality of your audio, as will many other factors.) Ensuring that those electrons don’t run into too much resistance is the key. When a wire is frayed the signal can be intermittent and totally drop out if not enough of a connection is present for the electrons to transfer the signal through the wire. A patch cord without adequate strain relief may become compromised before one with more solid construction. So there’s a qualified answer to why you want to buy patch cables with heavy-duty strain relief. Do it for the electrons!
On copper VS. steel
Another factor is the type of metal used in your patch cables. Copper is a better conductor of electricity so if you have the choice between copper and steel go with the copper. Yes the patchbay jacks are made of steel as are the contacts inside but the idea, in general, is to keep electrons moving as freely as possible and that happens with better conductors. Let’s say you have copper wire in your studio: If we look deep into most studio equipment we’ll find that there are many instances where your signal jumps from your copper cable to a steel contact inside the gear and back out again. We want to limit the resistance anywhere we can so as long as those contacts are secure, making a good physical connection and a good electrical connection, your signal path will operate just fine.
Patch Cord Shielding
Shielding is very important in the recording studio. Your patch cords should be shielded at least as good as your audio cable as to not pick up any outside radio frequency interference or other noise able to cross over into your audio path.
Patch Cord Features
Don’t get caught up in the sales pitch on the package or from a salesman. A good warranty is a feature worth considering though. If a manufacturer or reseller will replace a broken cable after years of use, that represents value as the new cable won’t cost you again. Not to mention a telling statement from the manufacturer that they stand behind their products. We’ve established that patch cables with good strain relief, quality audio conductors and adequate shielding are best. These are all the features that make an appreciable difference. An electron able to freely zip down its signal path with little resistance is key.
Are you in the market for a new recording studio desk? Have you outgrown your studio’s desk and thinking of buying or building a new, larger one? Today we will comment on some points to consider before you make a move.
WHERE TO START?
The simplest way of solving your desk scenario is to shop for whatever’s new and appealing to you online and have it delivered. Since most of us are working on laptops or other miniaturized machines, there is no need for the traditional tower computer compartment: This space can be reclaimed and used for another purpose, like more outboard gear! There are a lot of custom studio desk builders out there who can build your vision if you have the budget. Many commercial and some independent companies have several models available that you can customize a bit if you like. Don’t get too crazy with the customization though, you’ll go over budget in no time. The custom stuff is the way to go if you have less of a financial constraint as custom options can add up quickly.
MATERIALS
Much of the modern commercial recording studio desk furniture is made of MDF or similar materials and lack hardwood supports or shelves. Construction from all plywood and hardwood materials will ensure your recording studio desk will last. MDF tends to bust out at stress points like thru-bolts and anchors and are extra susceptible to exposure to moisture. If MDF gets moisture on it in just the right place (like edges and bolt holes) it will expand and there is no fixing this once it starts. Anything made out of real hardwood and plywood is less susceptible to moisture and will certainly be much more sturdy.
HANDY? GO DIY!
Yet a third way to attack this problem is to build something yourself totally from scratch. Pick a finished height; decide on how much tabletop space you need, where your outboard gear is going to live and where your cables will lay. Draw it up on some graph paper and then start cutting out your parts. You get a better-finished product if you use a table saw on the long cuts because it will make a much straighter cut than a handheld circular saw. After cutting the parts, dry fit them to make sure there are no issues with the parts going together square. Always use wood glue on connections that are to remain permanently attached and always dry fasten those connections that need to be broken down in the future. It’s much easier to assemble something as big as a recording studio desk with two people so grab someone who owes you a favor to assist with the build. If you’ve elected to go this route you probably have a shop to work in and don’t need this advice but it’s helpful the first time or two you do a project like this on your own. There is also the tried and true online used gear route if the options above don’t work out for you. Online forums, Craigslist and your favorite social media platform could land you the perfect recording studio desk you’ve ever had.
So what did we learn today? We learned that when you’re looking for a new recording studio desk solution, consider buying new, used, or build your custom desk to your own specifications. There are many options available so take a little time with this decision and find exactly the right fit for you and your studio.
TT PATCHBAY
Have you ever thought about owning a TT patchbay? How about a TRS bay? Are you constantly going behind your equipment to re-route signals? If so, you should know what a TRS or pro TT patchbay can do for you.
WHICH TT PATCHBAY?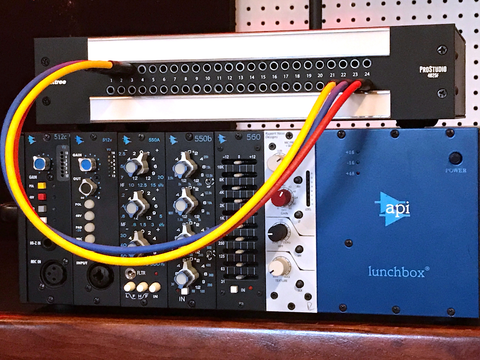
Let’s say you’ve got a 6 channel mixer, a few processors or noise boxes and you don’t transport your rig to other studios and you won’t likely ever expand your setup. You might get by with a 48 point TRS patchbay. Rotating the jack modules 180 degrees does jack programming. Many companies make this type of patchbay and while limited in its abilities, this model does keep your small studio’s wiring neat and your inputs and outputs all in one place. Having your ins and outs show up at a patchbay will save you a lot of valuable time and keep the outputs you use often normalled to the inputs you usually record with. If you think you might take your rig to a professional studio and will need to interface with that studio’s patchbay, Bittree’s new 4825F patchbay with 2 rows of 24 TT jacks is perfect for a small rig that needs a professional interface. The 4825 is available with DB25 input output/connectors on the rear panel making it easy to connect your outboard equipment.
BUT WHAT IF YOU SEE EXPANSION IN THE FUTURE?
If you have 24 outputs and 24 inputs or more, then you are the perfect candidate for a 96 point TT patchbay. It’s time to step up! 96 total patch points allow 48 sources and up to 48 destinations. Once you get up to this many inputs and outputs you are clearly amassing a lot of equipment and you want to make sure you’ve always got enough room to grow. Having extra patchbay real estate will always come in handy down the road when you upgrade your console or add equipment. Stepping up to a TT patchbay gives your studio a more professional vibe and going programmable will open up countless possibilities for signal routing, normalling and grounding schemes.
WHAT ELSE IS THERE TO CONSIDER?
Other patchbay features to question are: Does this bay have large label strips and front access to programming and grounding shunts? Does this patchbay even have programming options? Am I getting a solid chassis? Can I change grounding schemes? Does the TT patch-bay have a lacing bar on the back or any other strain relief?
TODAY’S TAKEAWAY
Buy the appropriate TT patchbay for your setup. Make sure you get something that has the features you’re looking for and is solidly built. Choose the connectors on the back to suit your application and make sure you get something that’s big enough to grow into!
Today we tackle the topic of patch panels! Does your studio have cables running all over the place that you plug into the front and rear of your equipment, as you need to make changes? Do you have issues with grounding and don’t know what end of the cable to check to track it down? You’ve probably been putting off buying that professional patch bay more than likely due to the historical cost. Times have changed and you can buy a professional patch bay that has all the rad features you need without the high cost that is typically associated with that type of equipment.

If you take your craft seriously and take care to avoid pesky ground hums, you should definitely have a pro patch panel for all of your equipment inputs and outputs to land. Your signal is only as strong as the weakest link and if your setup is solid, that weakest link must not be weak at all. Troubleshooting that hum or signal problem can be time-consuming and as we all know, time is money in this business. Spending that extra hour or so running down your signal issue could be the difference between delivering your project on time and not.
So how do we tackle this issue? Well, first you need to count up all of your inputs and outputs and use an Excel template to layout your patchbay. After you have the outputs all spread out on the top row and all of your inputs on the bottom row you’ll know how many patch panels you need. Now you need to determine the signal flow type for each point. For instance, line outputs of equipment need to normal into line inputs of your I/O’s, mic lines need to normal to your mic preamp inputs and so on. These connections should be half normalled meaning that the signal normally goes from top to bottom but when you insert a patch cord in either the top or bottom jack, the signal flow is broken. Say a mic line comes up on the top row, jack number one. If it’s half normalled, the signal flows down to the jack right below it but when you plug in a cord to that mic line, you break the connection to the bottom jack and you can now reroute it anywhere you want. It’s half normalled. In some cases, you might want to fully normal a patch point. By this, we mean that no matter what you patch into, the signal on the point on the top row ALWAYS flows to the one directly below it. Those patch points are fully normalled. When you order your patch panels, you want to specify how you want them built. The great news is that manufacturers such as Bittree offer patch panels that are fully programmable so you don’t have to commit to either half normalled or fully normalled. You can change your mind and reconfigure your patchbay at any time just by removing the label strip and moving a few shunts around.
Regardless of manufacturer, it is always advisable to go with a patchbay that is flexible rather than one that is hard wired to one configuration or another. There are lots of patch panel manufacturers out there and lots of options available. In order to be able to lift the ground at either the source or the destination end of a signal path might be the difference in solving your grounding issue quickly or spending several hours hunting it down.
Your audio connections are the most important connections in your career, after your personal connections with your peers and business associates. Good audio connections can keep your studio humming along, producing a quality product, and bad audio connections can well, keep you running around your studio troubleshooting! Today we’ll talk about how to make sure you’ve got good audio connections throughout your room and how to keep them that way.

There’s a heap of audio connections at your patchbay, a bunch more behind your I/O’s and more still behind your console and outboard gear. If you bought all premade cables to wire up your studio, you can be reasonably sure that all of those connections are solid. However, sometimes even the most professionally made cable can fail due to improper installation or misuse. Aside from visually inspecting all of your studio’s audio connections and making sure they are all reliable, there are a few other things you can do to make sure they stay that way. First, always make sure that there is no unnecessary stress on your cables. Always see to it that there is a decent amount of service loop where the cables land so that the pins and equipment connectors themselves are not stressed. A good rule to follow is ‘no guitar strings’. You never want a cable to be pulled tight from the connector, as this will almost certainly cause a failure of some sort over time, aside from making the connection hard to service. Next, you should always make sure that you don’t have a heavy road case or equipment rack parked on top of any cables. Most pro cables are tough and can take a rack rolling over it now and then but that doesn’t mean you should allow it. The fewer times this happens, the longer your cables will last. Another thing to look out for is knotting and tangling. Knots and tangled wires are not good for RF interference problems and can surely make tracing down a problem cable even more of a headache. This is almost the single most neglected part of a studio- the wiring and keeping it neat. Studios get added on to bit by bit as time goes by and eventually they become messy, that’s just the way it is. But if you are careful and lay in new cabling on top of the existing, taking care to tie them in with Velcro instead of tie wraps, you can keep your studio’s wiring neat as time passes.
If you’re made your own cables and you maintain your own cables, there are some basic rules to follow. Always heat the work (the actual audio pin you’re soldering to) and not the solder. The trick to a good audio connection on an XLR or other solder type connection is to heat up the wire and the pin you’re trying to solder to and let the heated connection melt the solder. If you heat up the solder and allow it to simply stick to the connection you may end up with a cold solder joint, which may or may not pass audio. To ensure that your audio connections are ALWAYS good, follow the preceding instructions and you should never have a problem.
So we covered a few things to look out for in your studio to keep all of your audio connections solid. There’s always something to do in the studio so if you’re handy with a soldering iron and you’ve got a bit of downtime to dedicate to studio maintenance, you can keep your studio’s wiring neat and your audio connections in good working order.
Knowing how to plan your patchbay is essential to ensuring that your studio is wired in a logical manner. Are you setting up a new studio, building a studio for the first time or a pro that normally doesn’t delve into the techy side of things? Do you need to know how to layout a patchbay from scratch for any reason? Laying out the patchbay is very important, as the bay is the nerve center of your studio. Most all of your audio signals show up here and it’s important that you place them in their proper places and proper configurations.

Modern patch bays are user configurable and naturally signal flows out from the top row the to bottom in. Keep this in mind when placing your equipment on the bay. For instance, put your #1 mic panel connection on the first jack of the top row, and #1 mic input of your console on the first jack of the bottom row directly below it. This way your #1 mic panel always is connected to input #1 of your console without having to ever patch it, since this is likely the configuration you want most of the time. If you don’t have a console, the first input of your API lunchbox will do. Remember, outputs on the top, inputs on the bottom. If this is too much to deal with, there is always a professional willing to show you how to plan your patchbay!
Step 1: Make a list of all of the available inputs and outputs you want to have patchable. Just type everything up in a text document, it doesn’t need to be in a fancy format at this point.
Step 2: Using an Excel patchbay layout template, (these can be found on the internet, such as the link below this article) fill in the names for your equipment. Step 3: Use as many sheets as you need to fit in all the equipment, keeping with the convention of output on the top and input on the bottom. Next, once you’ve decided how many bays are needed to fit in all of your connections, name your bays 1,2,3,4, etc. Name your top row A, next row B, next row C, etc. all the way down to keep a clear designation between rows. Your layout should look like this: 1A, 1B, 2A, 2B, etc. This
Step 3: Use as many sheets as you need to fit in all the equipment, keeping with the convention of output on the top and input on the bottom. Next, once you’ve decided how many bays are needed to fit in all of your connections, name your bays 1,2,3,4, etc. Name your top row A, next row B, next row C, etc. all the way down to keep a clear designation between rows. Your layout should look like this: 1A, 1B, 2A, 2B, etc. This ensures each row has a unique name and also one that when you look at it on paper, you know right where it is in the rack. When you’re done with this excel sheet, you should save it and make sure it’s always updated. This is where you are going to print out your patchbay labels when you’re done with your layout. If your template has been sized properly for your patchbay label strips, you can print them right out of Excel, cut along the lines and they should slide right onto your patchbay.
If you follow these steps, you will be able to plan your patchbay just like the pros do. Remember that planning your patchbay is one of the most important parts of the technical side of your studio and you should be sure about your layout before you commit to it. Although with Bittree’s programmable patchbays and E3 connectors you won’t have to commit to near as much as you would with a patchbay with DB-25’s or Elco 90’s.
So many of us are working at home these days that it’s become increasingly important for each of us to know as much as we can about how to set up a home recording studio. The music business has evolved immensely over the last several years and if you don’t have an efficient studio setup at home to work in, you’re not making the most out of your space. In this post, we’ll cover the basics of setting up an efficient home studio from your studio desk to your patch bay.
First things first- what’s your budget? Let’s say you don’t have any equipment at all, not even a patch bay, you just have an extra room set aside that you’re going to designate as your recording studio. We’re going to assume that sound isolation is not much of a concern in your case as this is probably the single most expensive part of setting up any space. You can cheaply do things like put up some packing blankets on the walls of a closet to set up a makeshift vocal booth but you’re not going to be building rooms within rooms- we’ll reserve this for another post. So back to the budget- how much can you afford to spend on the project and what is your main goal with setting up your space?
There are 4 key questions you should be able to answer before you begin setting up a new studio:
Let’s say you’ve got your budget nailed down, your space is totally appropriate, you’re not going to do any heavy demo or construction and your plan is not so ambitious that you need a pro to help you. First, start with your floor plan. Your main workstation or music studio desk has to fit comfortably in the room along with all of your other equipment. Pro recording studios are designed around the Neve, SSL console or other workstation where the engineer is seated- In this case that person is YOU and you want your workspace to be as ergonomic as possible. Your studio monitors should form an equilateral triangle with the engineer’s chair meaning they should each be as far from your head as they are from each other. Place your TT patchbays close to the user position and make sure your patch cords are within reach. Now you can decide where to put any additional furniture you may want in the room. An auxiliary equipment rack, a couch or chairs for clients and anything bulky you should include in your floor plan from the onset of your planning. After your floor plan is done you can move on to the technical side- deciding where to place additional electrical outlets, where and how to run your equipment wiring and mic panels, etc.
After you’ve placed your recording studio desk, got your furniture situated and monitors positioned, now you can move on to the technical stuff. Remember, all of the planning done so far is on paper, or done with cardboard mock-ups or tape on the floor. You don’t need layout software or special expertise. Anyone can do it and it gives you instant feedback on what seems to work and what does not. Most modern studio equipment does not use much electricity but as a rule of thumb, you should try to keep the gear in your studio on its own breaker at LEAST. Ideally, your equipment should all have its own ground, separate from that of the rest of your house but this is a topic for another post. You’ll need some basic sound treatment for sure- keep your corners filled with bass traps, place absorption behind the mix position to kill early reflections and treat any parallel walls a bit to minimize flutter.
As a bonus, if you have an adjacent room or closet that you can remotely locate a guitar cabinet or turn into a vocal booth, install a patch panel in there so you can send signals to/from your workstation in and out of that room. Mic inputs, headphone feeds and line level tie lines on your patch panel can all be wired up to your TT patchbay easily with DB25 to XLR snakes, XLR to TT or other appropriate off the shelf cables. If you don’t have an adjacent room or if that isn’t part of your plan, don’t worry; this isn’t mandatory to setting up a home recording studio. There are as many ways to record as there are ways to set up a studio and what is right for one person might not work for someone else.
Finally, with the space left over, you can decide where to hang guitars or other instruments, place art and decorate your new space. Have fun, be creative and check out our future posts for more tips on how to set up a home recording studio!